
Only an experienced artist can draw the sea and accurately convey the color and power of the water element. An artist who paints the sea is called a marine painter and paints different kinds and the state of the sea and learn this all your life. Painted pictures of the sea with paints, gouache or watercolors, and better with oil very accurately convey the entire range of shades and depth of color of the sea. The sunset on the sea looks especially beautiful in its colors. But let's start step by step draw the sea with a simple pencil.
Drawing the sea is not easy, especially with a simple pencil. It is difficult to convey sea waves and surf with a simple pencil. With a pencil this can only be done using the stroke technique. You will need to constantly rub the strokes with your finger or a stiff eraser.
1. First, let's highlight the main contours of the sea

To begin, highlight the horizon and the main contours of the coastline of our composition. On the shore, immediately draw the outlines of the coastal stones. Then we will separate the horizon line of the sea and draw the line of the beach and draw the sun. You can also draw the outlines of small waves around the stones.
2. “Scatter” the sea waves over the pattern

Now we need to draw the initial outlines of the waves throughout the space allocated for the sea in our drawing. Make pencil strokes over the entire surface of the sea, but you should not do too many of them, otherwise the waves will not turn out large.
3. Shade the water surface with strokes of a soft pencil

At this stage we need to draw and shade with strokes the contours of the waves near the stones. To soften pencil marks, you can rub them with your finger or a hard eraser. The shaded part of the sea can also be rubbed with a piece of paper or your finger.
4. Sand on the coastline

Now we will pay attention to the sea coastline. In our picture there is a sandy shore by the sea, but you can draw another one. Just like the surface of the sea, the sand needs to be shaded with pencil strokes, lightly rubbing them. If necessary, you can remove excess blackness in some areas of the sea, again using an eraser. After this, you can “paint” the stones, heavily shading them, and draw small clouds.
5. How to draw the sea. Clouds

At this stage we will draw not the sea, but what is above it - the sky and clouds. If necessary, in some areas of the sea you can lightly erase the strokes vertically with an eraser, this will give the sea additional highlights. But first, add a few small free-form clouds with faint strokes to emphasize the movement of air. Draw the sun, such a “trifle” always makes any drawing more attractive and realistic.
6. Drawing the sea on a graphics tablet

Now you know how draw the sea with a simple pencil and you can try to make another drawing and color it with paints, as in this color picture of the sea, which I made especially for this lesson on a graphics tablet.
Video on how to draw the sea.
Of course, the drawing of the sea will look much more beautiful if you can draw a sailboat in the distance. In this lesson you will learn how to draw both the sea and a sailing frigate.
Wandering the seas on sailing ships, pirates made caches of looted treasures, many of which were never found. Perhaps these treasures never existed. But not only were maps used by pirates to indicate the location of a treasure island at sea, they were used primarily for navigation.
If you decide to draw a picturesque seascape, draw dolphins. These sea animals will definitely turn out beautiful if you draw them step by step. Draw the outlines of the sea and dolphins with a simple pencil, and then color the entire drawing with paints.
The turtle lives in the sea and is probably the most ancient inhabitant of the seas. Over all the years of evolution, turtles only learned to go to land to lay eggs, but did not leave the sea forever, like other animals. In this lesson we will try to draw a turtle by the sea ourselves.
A mermaid is half fish, half human, so you need to draw the mermaid not only a tail, but also fish scales on it. A prerequisite for a picture of a mermaid must be the presence of a body of water, after all, they live in a river or at sea.
What's more relaxing and energizing than waves and ripples on sparkling water? The fresh ocean breeze from the heavens fills our souls with joy and inspiration.
Learn how to paint the ocean by capturing the atmosphere of a sunny, windy day at sea in a simple watercolor landscape.
You will need:
- A sheet of cold pressed watercolor paper, about 25x35 cm in size.
- Three round brushes: large (No. 12), medium (No. 8) and a small brush for detailing (thin brush No. 4).
- Watercolor colors:
- Cobalt blue
- Naples yellow
- Cadmium red
- Venetian red
- Phthalocyanine (Phtalo blue)
- Prussian green
Note: The last two colors will be used to paint the water. Feel free to replace them with other blues and greenish-blues that are bright, clean and intense.
Step 1. Pencil sketch
Make a very light preliminary sketch. The lines are so thin that they are barely visible.
Step 2. Draw the sky

Wet the paper above the horizon, avoiding the foreground, and wait until the water is absorbed.
Using your largest brush, use a few light strokes of Naples yellow to outline the location of the clouds. Dip your brush into Cobalt blue and paint the top edge of the clouds. Gently soften some edges with a clean, wet brush to achieve a balance between sharp and blurred color transitions. Once you've defined the bottom of the clouds, continue painting the blue sky.
While the paper is still wet, use a mixture of Cobalt blue and Cadmium red to paint the shadows of the clouds.
Step 3. Draw water

Load up a large brush with more diluted Phtalo blue and make the first pass using the wet-on-dry technique ( wet paint, applied to dry paper).
Alternate using the surface of the brush, using only part of the bristles, and tilt the paper slightly. Thanks to the texture of the paper, small areas of the sheet will remain untouched, creating the illusion of sparkling ocean water.
While the paint is still wet, deepen the waves in the foreground by adding a few quick, thick strokes of Phtalo blue and Prussian green. This will bring the foreground closer to the viewer.
Step 4. Draw the background and waves

Paint the hills in the background using a mixture of Cobalt blue, Naples yellow and a dash of Cadmium red. Keep the color muted and soften the edges to hint at distance.
After making sure the ocean area is completely dry, paint in the waves and ripples. To create the effect of depth, the strokes in the foreground should be larger and brighter than those in the background.
Step 5. Draw the boats

Using a medium and small brush, paint the boats and the people in them. Use a mixture of Cadmium red and Venetian red to create an accent color. Don't overwork the shapes - leave them blurred for a more natural look.

You may want to deepen the color saturation of the hills to make them look better. Also, add a couple of strokes to the foreground to bring it forward even more.
It's time for a couple of final touches here and there as needed. And don't forget to paint some seagulls in the sky to add more life to the composition.
The question “How to draw the sea?” It’s not just artists who ask these questions. Almost everyone who admires sea views wants to somehow capture this gift of nature, which just begs to be put on canvas. Or, at least, into the camera lens.
A little information. Landscape in art is a genre in which nature is depicted. Also, individual paintings of this genre are called landscapes. The landscape can be urban - here nature has already been transformed by man to suit his needs, or, for example, rural. If the sea is depicted, then such a landscape is called a marina. And artists, accordingly, are marine painters.
So let me give you a few useful recommendations. In this article, our main task is to enable observation, as well as consider some laws of composition and color solutions.
1. Horizon
Do you know where the horizon is? Don’t read the answer right away, think, try to answer intuitively. In the distance, where the sky turns to sea? Or where does the earth end? Well, no. The horizon is always at our eye level. You can check it today on the street, especially if you are outside the city, where the horizon is clearly visible. Squat down, stand up - the horizon will move with you.
Where should it be placed on the sheet? In the middle? Not worth it. The answer to this question has long been found by artists. You need to decide what is more important (more beautiful, more interesting) - the sky or the sea? If it is the sea, then there is more space for it, and if it is the sky, then the sky. It’s better to solve the horizon issue using the so-called “rule of thirds”; try it, you won’t be mistaken. Divide the sheet into 3 parts vertically, draw two lines. If you are more interested in the sea, it will occupy 2 parts, if the sky - it. An excellent example: the third part is given to the sky, the third to the sea, the third to the beach (sand):

And here there is more sea:
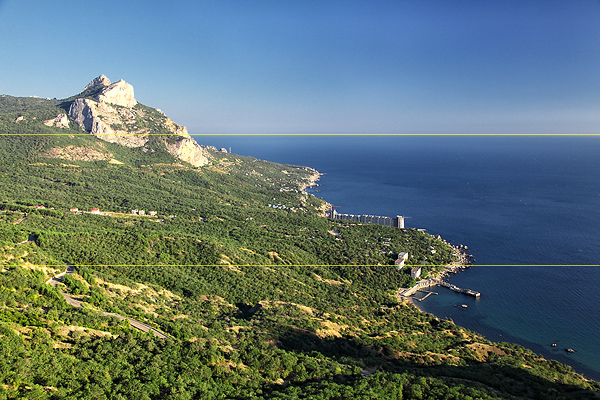
Of course, the sky can also prevail, especially this:

2. Which is darker?
Before drawing a seascape, it is important for the artist to decide the question - what is darker, the sea or the sky? And stick to this contrast. Both the sea and the sky have blue shades, so the question is very important. And they solve it, as a rule, towards the dark sea.

3. Drawing the sky
Drawing the sky is quite simple - look carefully at the sky and you will understand everything. It is usually dark blue at the top, and gradually becomes lighter towards the horizon. As in the photo above. Therefore, we simply gradually add lightness to the sky; sometimes it is almost white below.
4. Clouds
They are usually depicted as white. First, luscious strokes are usually made with white paint without water or solvent. Then, downwards, they can be smoothly rubbed into the sky with a very dry brush (another) or the bottom of the clouds can be made light purple-gray. All transitions are smooth.

5. Sea
The sea is also drawn from dark to light. At the horizon it is dark blue, which creates an excellent contrast with the sky and depth of space. You can just take blue paint without mixing it with anything. Then, closer to the third part of the sea, we add a little emerald green and white to the blue, more and more brightening and “greening” the water towards the shore.

6. Sand.
Sometimes they don’t paint it, but if you want... For sand it is better to mix light ocher with a small amount of red and white. And make the transition from sea to sand smooth. This can be achieved by placing strokes of “sea” and “sand” colors next to each other, gradually “mixing” one color into the other.

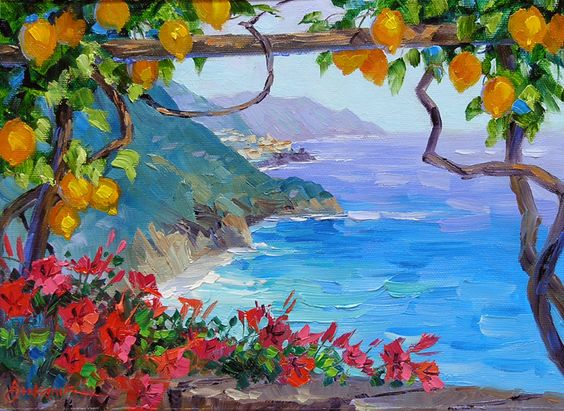
We invite you to paint as many as 4 sunny sea paintings on the course
ITALIAN LANDSCAPE
Meeting frequency: 1 time per week
Level of training of participants: from scratch and above.
Broadcast time: 20:00 Moscow time, recording is provided the next day to all participants
Feedback: given by the teacher on all your work during the course and 2 weeks after its completion


Cost of participation
Four online lessons + lesson recordings + feedback during the course
5500 rubles
>>Checkout
It is expensive?
Let's get a look. The cost of an in-person painting lesson in Moscow is from 1,500 rubles. Add to this the time and money that will be spent on travel. And also the need to go somewhere in the evening after work or negotiate with grandmothers, husband or nanny to look after the children.
Another thing is to pour yourself a cup of tea, occupy your loved ones with something interesting or sit next to them with brushes and paints, and DRAW. Online lessons help you do what you want, when it suits you. It's much nicer that way, isn't it?
Do you think that only professional artists can paint the sea beautifully? Following this simple step-by-step instructions, you will paint a beautiful seascape in gouache in about twenty or thirty minutes.
You will need:
narrow tape
gouache (blue, white, golden or yellow ocher, dark green, red and black)
watercolor paper
brushes: flat No. 16, round No. 6, linear fine
jar of clean water
cling film to protect the table surface from paint
Stages of work:
1. Protect the table with cling film.
2. Secure a piece of paper vertically with tape.
3. Place a strip of tape just below the middle of the sheet to mark the horizon line.
4. Draw the sky. To do this, paint the surface gradually, lightening the shade of blue. It will be darkest on top and whitish below.


5. When the sky is completely painted over, draw the clouds.
Remember what clouds you have already seen and look at the example.


*Your clouds may be a slightly different shape. This is fine. There are no absolutely identical things in nature.
6. Carefully remove the tape that was in the center.
Mix white gouache with blue. You will end up with a light blue color. Paint the sea with it.
But leave a narrow strip at the bottom for sand.
7. Now let's add realism and liveliness to the sea. Let's highlight the horizon line in blue. Draw with a slightly lighter shade horizontal lines- waves.
*Please note that different shades of blue gouache are used. Mix white with blue to get the desired color.
8. The sea is ready.
Drawing a sandy beach. To get the desired shade, add a little golden or yellow ocher to the white gouache.
9. Draw sea foam with white color.
10. Add palm branches.
Use a flat brush to easily paint the narrow leaves. Simply load your brush with dark green paint and, holding the brush flat, draw short, sharp lines with the tip of the brush. You will end up with tapered stripes.
* Practice on a rough draft so as not to spoil the drawing.


11. Add a little golden ocher to this green color. Using the resulting color, paint the leaves on top of the already finished ones.
12. Add more emerald to the light green shade. Using the resulting shade, add more leaves. This will make the palm branches look more alive.
13. Draw two birds in black.
They look like the letter V or a check mark. Add white ticks on top.
You have got flying birds.
14. Using a very thin brush, paint two starfish using red gouache.
15. Draw a sailboat in the distance.
Using white paint, paint horizontal stripes near the ship.
Now the picturesque seascape is ready!
You can peel off the tape. Thanks to him, we got a neat frame around the picture.
You have detailed instructions on drawing a beautiful sea view. Prepare necessary materials and go ahead - create!
The article was created based on a video tutorial from the YouTube channel Tessa Art